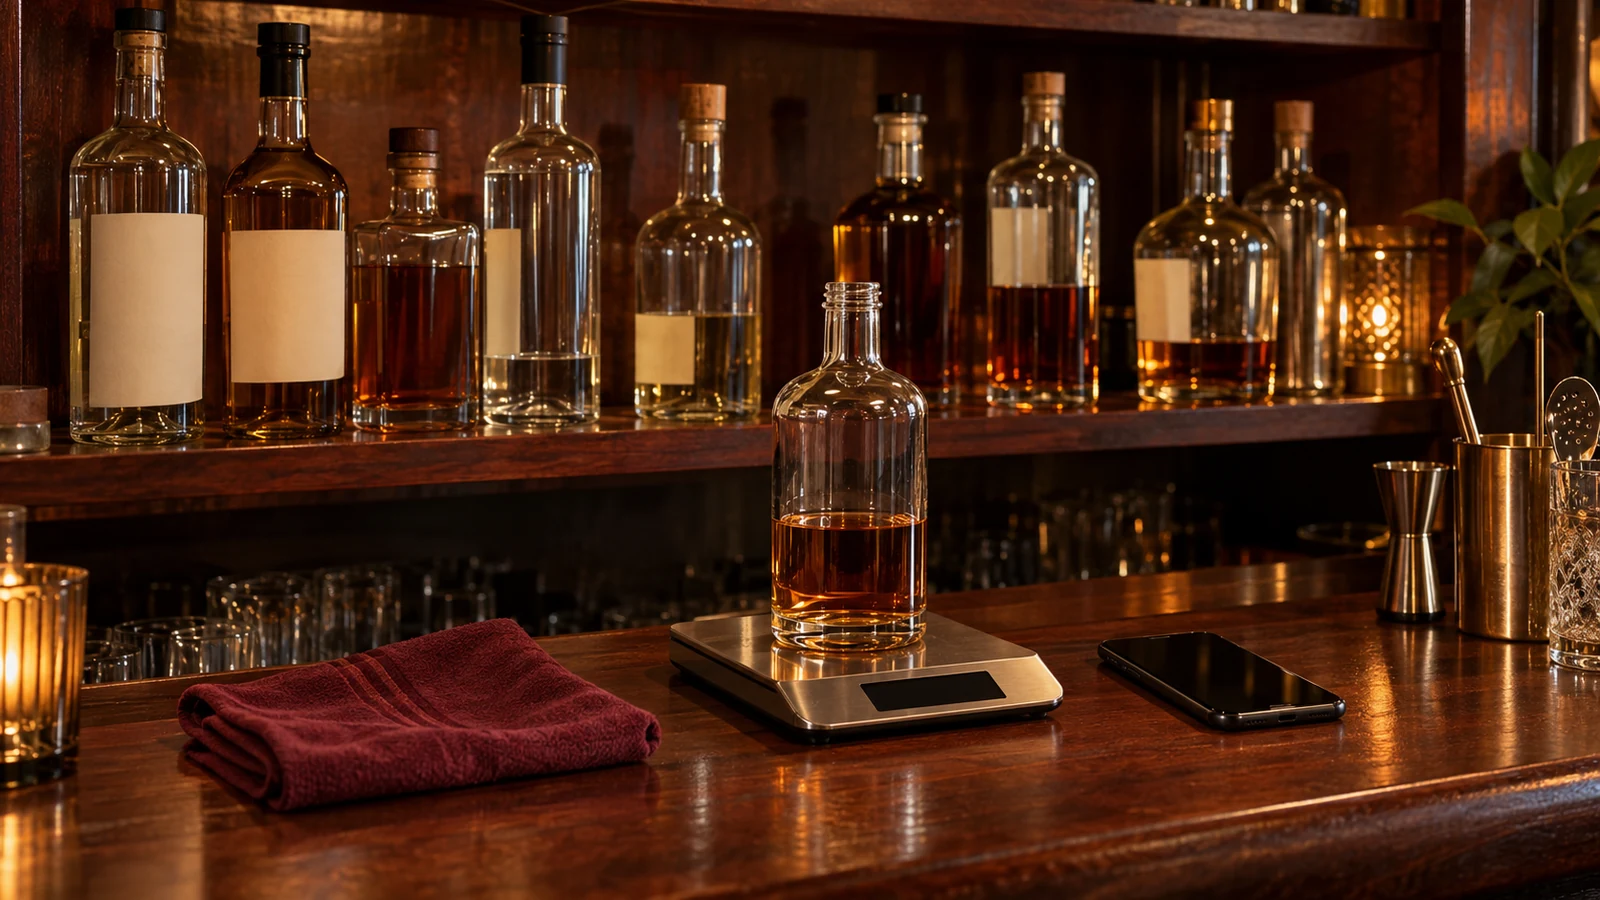
Buying a scale or a barcode scanner that your counting method does not use wastes money and leaves staff with one more device to manage. Choose how you will measure open bottles first, by eye or by weight, then pick software that supports that method, and buy only the hardware the method needs.
This guide compares four setups: an app alone with open bottles estimated by eye, an app with a bottle scale, an app with barcode scanning (by phone camera or a separate scanner), or a scale plus scanning. A scale changes how you measure the liquid left in open bottles; it needs each product’s empty bottle weight, plus either its full weight or the liquid’s density. A barcode speeds up finding and adding items, but it identifies only the product and its declared size: under GS1 rules any change in declared net content needs a new code, and US rules (27 CFR 5.203) authorize 25 container sizes for distilled spirits, from 50 mL to 3.75 L. Decide on the method, check that the software and your POS work together, then test a full count during a free trial.
This guide is for owners and bar managers of small independent bars and restaurant bars in the US who have decided to move stock counts into software. It names vendors only where their public pages explain a method or a pricing model; it does not rank products or quote prices.
| Input or item | Typical value or source | Why it matters |
|---|---|---|
| Open-bottle method | Estimate by eye (tenths, or tapping the level on a bottle image) or weigh on a scale | Decides whether you need a scale at all |
| Bottle weights | Empty weight for each product and size, plus full weight or density; some apps supply a database (Sculpture Hospitality) | Weighing gives readings only when these are on file |
| Bottle sizes | 25 authorized US sizes for distilled spirits, 50 mL to 3.75 L (27 CFR 5.203) | Each size is a separate item in the count |
| Barcodes | GTIN identifies product and declared net content; a new size needs a new GTIN (GS1) | Speeds lookup; says nothing about fill level |
| POS link | Supported POS systems listed on each vendor’s pricing page | Lets you compare usage with sales |
| Locations | Backbar and WISK price per location | Sets the cost for more than one site |
| Count interval | Weekly or bi-weekly suggested in Backbar’s guide | Sets how much counting speed is worth |
Which inventory setup fits your bar?
The right setup follows from two questions: how precisely you need to measure open bottles, and how much time each count is allowed to take. A bar with a short back bar and one person counting can run an app alone; a bar that wants to track pours closely adds a scale; a bar with many products and new deliveries every week gets most from barcodes.
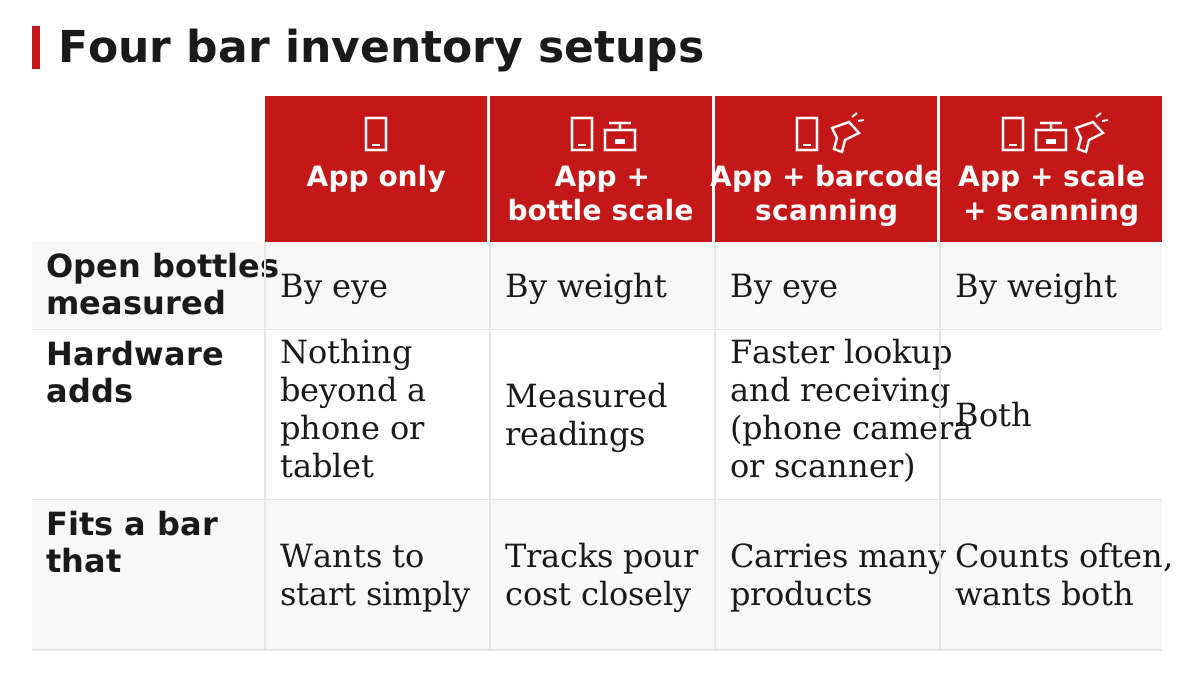
| Setup | How open bottles are measured | What the hardware adds | Fits a bar that |
|---|---|---|---|
| App only | By eye, in tenths or by tapping the level on screen | Nothing to buy beyond a phone or tablet; some apps scan barcodes with the camera | Has a short back bar and wants to start simply |
| App + bottle scale | Weight, converted to liquid left | Measured readings instead of estimates | Wants to track pour cost and losses closely |
| App + barcode scanning | By eye | Faster item lookup and adding new products, by phone camera or a separate scanner | Carries many products and receives deliveries often |
| App + scale + scanning | Weight | Both of the above | Counts often and wants both measured readings and fast lookup |
Inventory apps also differ in what surrounds the count: recipes for cocktails, invoice capture, ordering and POS links. Check those against your workflow before thinking about hardware; Step 3 covers them. If you are also redesigning the drinks list, the cocktail menu design guide explains how to set the list length by what the bar can make, and how to map each drink’s ingredients to stock records.
Takeaway: Pick the setup by counting method and count time, not by how many devices a vendor sells.
Step 1 — Choose how you will measure open bottles
Decide between estimating open bottles by eye and weighing them; that choice decides whether you need a scale. Full, sealed bottles are simply counted either way. Only the open bottles on the rail and back bar need measuring.
By eye. The traditional method is “tenthing”: estimating each open bottle to the nearest tenth. Some apps turn this into a visual step; Partender, for example, describes its count as tapping where the liquor level sits on a bottle image and swiping to the next bottle. No hardware is needed, and results depend on the person counting.
By weight. A scale reads the weight of an open bottle, and the software works out the liquid left. Sculpture Hospitality, which sells inventory services, describes the requirements: a digital scale with fine resolution in grams or ounces, and the weight of each empty bottle. It notes that some inventory apps include databases of full and empty bottle weights for popular brands.
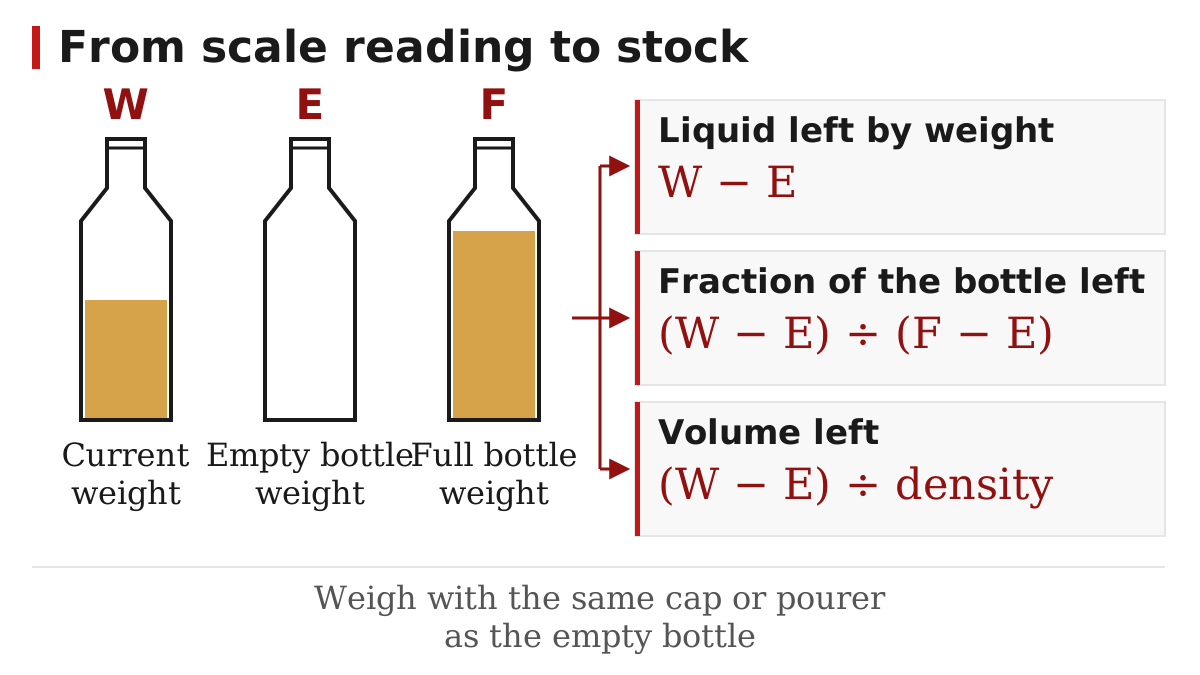
The arithmetic is simple once the bottle weights exist:
| What you want | Formula (variables) | Needs |
|---|---|---|
| Liquid left, by weight | W − E | W = current weight; E = empty bottle weight |
| Fraction of the bottle left | (W − E) ÷ (F − E) | F = full bottle weight; result has no unit |
| Volume left | (W − E) ÷ density | Density of that product; with weights in g and density in g/mL, the result is in mL |
Use one mass unit for W, E and F, weigh every bottle with the same cap or pourer as its empty weight, and do not mix ounces of weight with fluid ounces.
Density matters for the volume conversion. WISK, another inventory vendor, notes that 80-proof spirits are lighter than water while liqueurs and cordials are heavier, so one conversion does not fit every bottle. The fraction formula avoids density because it compares the bottle with its own full weight.
Common mistake: Using one empty weight for every bottle of the same size. Bottle glass is not standard across products, which is why vendor databases list weights by brand, so a tare figure for one 750 mL bottle can give wrong readings for another. Record weights per product and size, with the same cap or pourer attached.
Takeaway: Choose weight if you want measured readings and can keep a bottle-weight list current; choose visual counting if you want no extra weighing step, and time both in your trial.
Step 2 — Know what a barcode can and cannot tell you
A barcode tells the app which product and which bottle size it is looking at; it does not tell it how much is left. A scanner therefore speeds up finding items and receiving deliveries, but it does not replace a measurement of open bottles.
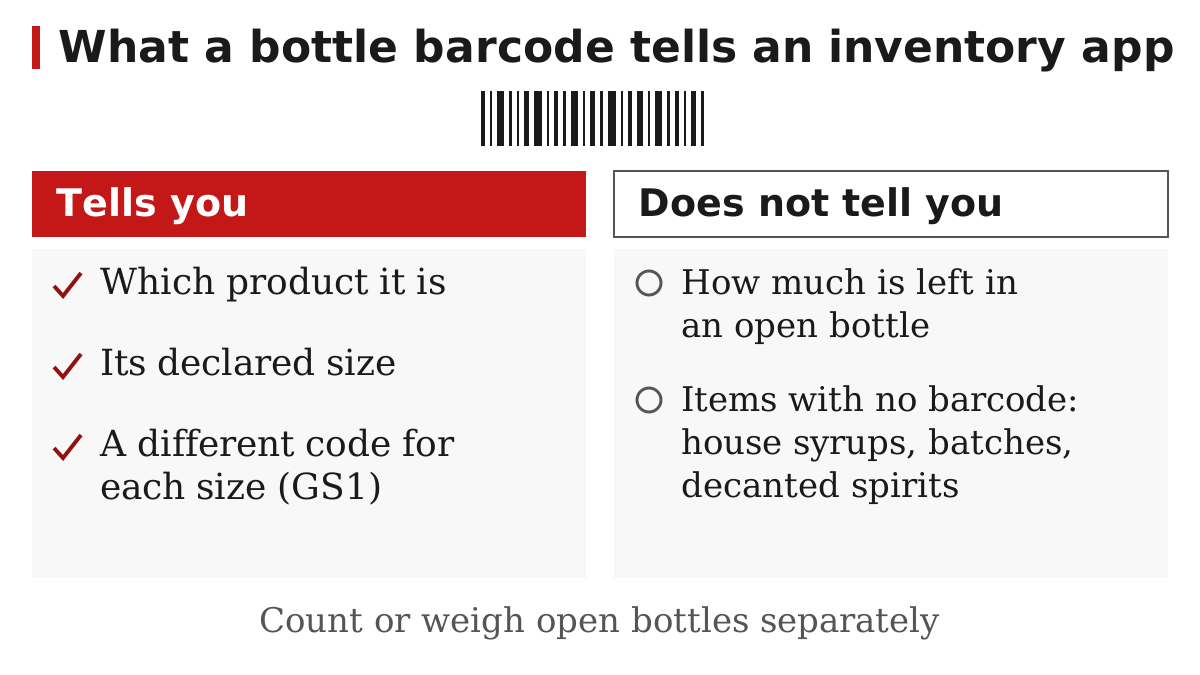
The reason is in the GS1 numbering rules behind UPC barcodes. GS1’s GTIN Management Standard says that any change to the legally required declared net content printed on a pack requires a new GTIN, the number the barcode carries. So a 750 mL and a 1 L bottle of the same spirit have different codes, and an app can tell them apart from a scan. US rules make the point practical: 27 CFR 5.203, as current on 5 October 2026, authorizes 25 metric container sizes for distilled spirits, from 50 mL up to 3.75 L, including 700 mL, 750 mL, 1 L and 1.75 L. Every size you stock is its own line in the count, with its own code and, if you weigh, its own bottle weights.
Sculpture Hospitality says barcode scanning simplifies adding new items and updating stock levels, and mentions RFID tags as a way to track individual items. For a small bar, ask the vendor whether its app reads barcodes with the phone’s camera or works better with a separate scanner, and test both on your own shelf. Items without a manufacturer barcode, such as house syrups, batched cocktails or decanted spirits, still need manual entries or labels you create. Listing the prepared ingredients each drink needs, as the first step of the cocktail menu design guide suggests, gives you that list of house items.
Takeaway: Test the app’s own barcode scanning first and buy a separate scanner only if the trial shows it helps; keep a separate method for how much is left.
Step 3 — Check the software against your workflow
Choose software that fits how your bar already works: your counting method, your storage areas, your drinks list and your POS. Feature lists look similar across vendors, so check each one against your own routine rather than against a generic checklist.
| Check | What to ask | Why it matters |
|---|---|---|
| Counting method | Does it support visual counts, scale readings, or both? | WISK’s guide says to match the software to the way you already measure |
| Scale and scanner | Which models work with it, and how do they connect? | Hardware that does not pair is wasted |
| Storage areas | Can you count by area (back bar, store room, cellar)? | Matches the order staff walk the room |
| Recipes | Can it hold cocktail recipes and ingredient costs? | Needed to compare expected and actual use |
| POS link | Does it integrate with your POS system? | Inventory and sales stay in step without re-typing |
| Invoices and ordering | Can it capture invoices and build orders by supplier? | Keeps unit costs current |
| History | How much count and order history does your plan keep? | Trends need several months of data |
| Support and setup | Support hours, setup help, data entry | Late-night bars need support when they count |
If you sell drinks or food through delivery apps, check whether those orders reach your POS, because the apps’ payout statements are a separate record; how delivery apps charge restaurants explains what those statements show.
WISK’s buying guide suggests narrowing the field to two or three products and asking each vendor about your key features, your equipment, your POS, their support hours and their setup process. Recipe support matters if you want the app to work out how much of each bottle your cocktail sales should have used, so you can compare that with the count; WISK’s guide makes the same point for menus with cocktails and mixed drinks. A list that changes often only adds the work of keeping recipes current; the cocktail menu guide covers setting the list length.
Takeaway: Shortlist two or three apps that support your counting method and your POS, then put the same questions to each.
Step 4 — Read how the pricing is built
Bar inventory software is sold as a subscription, and the cost is built from a few parts: the plan tier, the number of locations, the billing period, and any hardware or setup on top. Compare vendors on the same set of parts rather than on the headline price.
| Price component | What vendors’ pricing pages show (read 7 October 2026) | What to ask |
|---|---|---|
| Plan tier | Backbar, WISK and Partender each list more than one plan | Which features, integrations and history sit in which tier? |
| Locations | Backbar charges paid plans per location; WISK prices per location or per property | What does a second site add? |
| Billing period | Monthly or yearly at Backbar and Partender; annual or quarterly at WISK | Is the yearly price paid upfront? |
| Free plan or trial | Backbar has a free account (one location, six months of history) and a free trial of paid plans; Partender offers 14 days free; WISK offers no free trial but a 60-day money-back guarantee | What stops working when the trial ends? |
| Hardware | WISK’s single-venue tier lists “Mobile app + Bluetooth scale” | Is the scale included, rented or bought separately? |
| Setup and training | WISK publishes a one-time setup fee on every plan, covering onboarding, POS integration, catalogue setup and a first-inventory walkthrough; Partender lists staff webinar training on its monthly plan and VIP onboarding on its Enterprise plan | Who builds the product list and bottle weights, and is that in the setup fee? |
Prices change often and depend on the options you pick, so take a written quote that lists every component above for your number of locations. If you also sell drinks through delivery apps, those sales reach you through a separate channel; how the platforms charge is explained in our guide to restaurant delivery app fees.
Takeaway: Ask every vendor for the same breakdown: tier, locations, billing period, hardware and setup.
Step 5 — Run the pre-purchase check
Before you pay for a plan or hardware, answer a short set of questions about your bar and run one full count in a trial. The answers point to the setup you need and show whether the software works on your shelf.
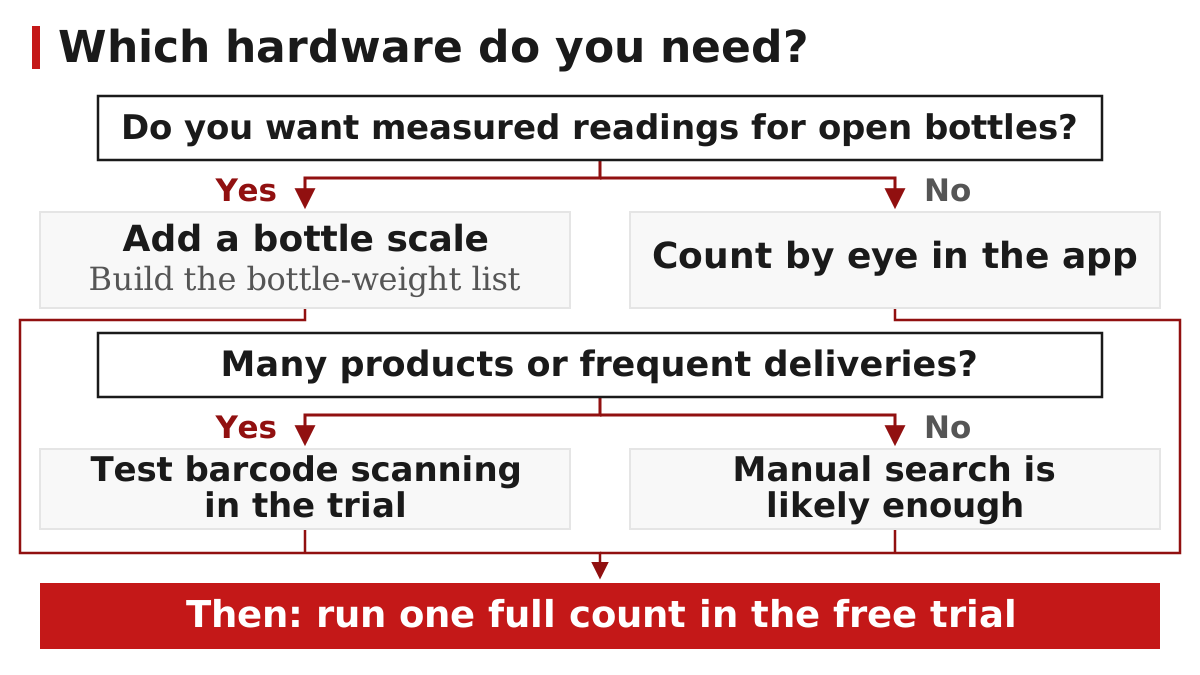
| Question | If yes | If no |
|---|---|---|
| Do you want measured readings for open bottles, for pour cost or loss tracking? | Add a scale and plan time to build the bottle-weight list | Start with visual counting |
| Do you carry many products, or receive deliveries several times a week? | Test barcode scanning in the trial | Manual search is likely enough |
| Do you have more than one location or storage area? | Check per-location pricing and counting by area | A single-location plan may do |
| Does your POS appear on the vendor’s integration list? | Plan to link sales and usage | Expect to enter sales manually or choose another app |
| Do you want to compare what cocktail sales should have used with what the count shows? | Check recipe support and who enters recipes | Basic product counts are enough for a stock value |
| Can one full count be finished in the trial period? | Run it, and time it | Ask for a longer trial before paying |
During the trial, count the whole bar once with the new tool and record how long it took, which items were missing from the product database and which bottles had no barcode or bottle weight. Those three notes tell you more than any feature list. Keep the count interval fixed afterwards so that each count covers the same period; Backbar’s guide suggests weekly or bi-weekly. More bar operations topics are collected under beverage service.
Common mistake: Buying hardware before the trial. Run the trial count first; you may find that the app’s visual count is fast enough, or that your POS link matters more than a scanner.
Takeaway: Decide on hardware only after one full trial count on your own shelf.
When this does not apply
- Draught beer and wine by the glass. Kegs and opened wine bottles need their own measuring routines; this guide covers bottled spirits and similar products.
- Larger groups. Multi-site operators usually need central purchasing, transfers between sites and approval steps that go beyond this checklist.
- Outside the US. Container sizes here come from US rules; other countries authorize different sizes.
- Legal and licensing questions. Record-keeping duties for alcohol depend on your state and licence; check them with your local authority. This guide gives no legal view on them.
- Vendor details change. Plans, trials and integrations were read on 7 October 2026; confirm them before you buy.
More drinks-side topics sit under beverage service, and menu costing topics under menu planning.
Takeaway: Use this checklist for bottled stock at one or two sites, and confirm rules and vendor terms locally.
How we checked this
We compiled this guide on 7 October 2026 from the US standards of fill for distilled spirits (27 CFR 5.203 on eCFR), GS1’s GTIN Management Standard, and the public pages of four inventory vendors: Sculpture Hospitality, WISK, Partender and Backbar. Vendor statements are reported as what each vendor says; we did not test any app, scale or scanner, we do not rank them, and we left prices out on purpose. The setup comparison and the formulas are our own way of organising that material. Other restaurant and bar operations articles are on the blog, and About explains who runs this independent site.
Takeaway: Treat vendor features as dated claims and confirm them in your own trial count.
Related reading
- Cocktail menu design: structure, layout and examples — Set the drinks list and its prepared ingredients before building the product list.
- Restaurant delivery apps: types, fees and how they make money — Understand delivery payout statements before matching them against stock.